When I bought this, it was called a catapillar. You can see why! Pillars for the cats. I've had this caterpillar since 2002. One year I dressed it up as our Christmas tree. This was in our home on Hobart.

JB bought the new catapillar in town around 2009. It used to be in the living room, and had a ladder. The ladder was broken, and it was removed.


It was in a bad way. The sisal has been ripped off, good cats for using it as a scratching post, and they are now attacking the cardboard underneath. First, I looked for repair materials. The most difficult thing is finding the correct terminology. I began with 'twine' and found that sisal was a better term. You can Google it, and you will realize that I'm not the only one needing to do repairs! It autofills it for you.
Step 1 – find sisal
I searched for sisal nearby, and found it at Crappy Tire. I usually print off the item, than give the sheet of paper to JB. More often than not, I forget to tell him which store has the prize! Such was the case. He wisely asked, I wrote it on the paper for him!

After this, I found a couple of 'How To' YouTube videos. Some were better than others. Some suggested staple guns, others hot glue. I went for both. The upper post is fine, and I was able to ignore it. I thought about using it to replace a more used post, but it was easier to simply removed the four lower posts.
Step 2 – Friday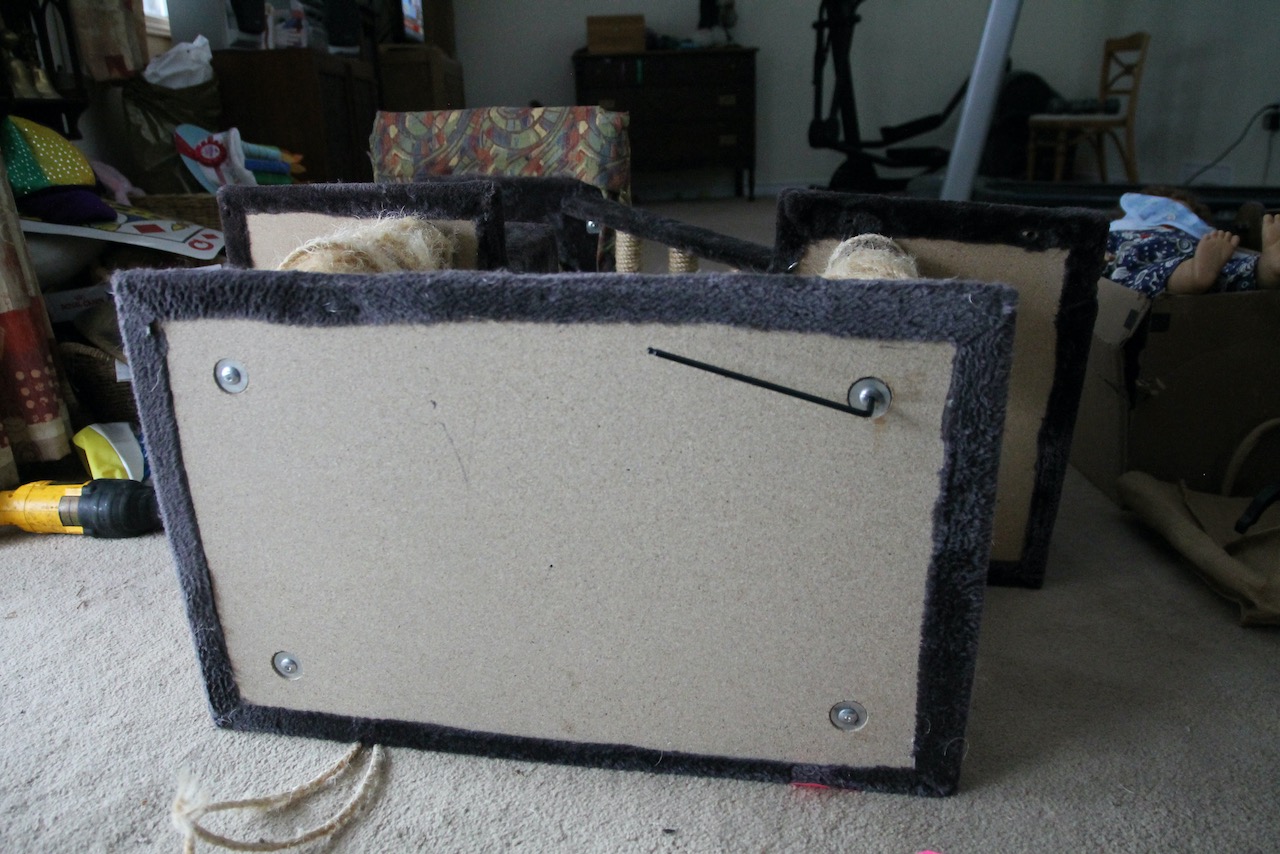


Step 6 – Monday
Sent hubby, AKA Personal Assistant, back to the store, since the post (above) took up the entire 50 feet! Hubby came back with two packages, as requested.
Step 7 – Tuesday
I thought it's be a perfect project as we had snow, then ice pellets, then rain. Yuck. I went back at it. Cinnamon was on the caterpillar upstairs, and I invited him downstairs to help. He took his position.

Unfortunately, he didn't last. He and I had big walkies in the snow in the morning, and he seemed tired!
All four posts were done. Time to reassemble it. First thing, though, was to vacuum the base. Back upstairs for the vacuum. I remembered that there is a clog in the hose, as I tried to use the hose. No good. The base I vacuumed up with the regular beater, and it looks better. I screwed it all back together. All was well with the world.
Upstairs again, I looked up how to unclog the vacuum. Video One, and Video two. Dysons are a little tricky, but I love mine and it has lasted me a good while. If you can afford it – it is worth it.

🐈 🐈 🐈 🐈 🐈 🐈 🐈 🐈 🐈 🐈 🐈 🐈 🐈
14 comments:
Happy are the cats who have a hooman like you...good job done, and I hope they enjoyed all your efforts.
...there's always something to fix.
Good job! The cats should be able to get many more years out of it.
Good job! The cats should be able to get many more years out of it.
Hari OM
Good work - great winter project! YAM xx
I am impressed with how industrious and capable you are. Again.
My daughter just renovated her caterpillar too. She got the natural fiber twine at Dollarama. If your twine is natural fiber (no plastics) you can toss it in the woodstove.
Looks like your cats live in heaven :)
Well done.
Wow, you could write a book on your DIY !!! Well done to get it like new again. I wonder if the cats will appreciate all your, both you and JB.'s efforts.Having an assistant to do the shopping is a huge bonus.
Those are lucky cats.
Nice stairs on that model. You did a nice job rejuvenating it! Now the cats have lots of work to do in order to scratch off the new parts! Linda in Kansas
You So Rock - What A Fantastic And Useful Project - Happy Kitty Kitties There - Well Done
Cheers
What a process.
Post a Comment